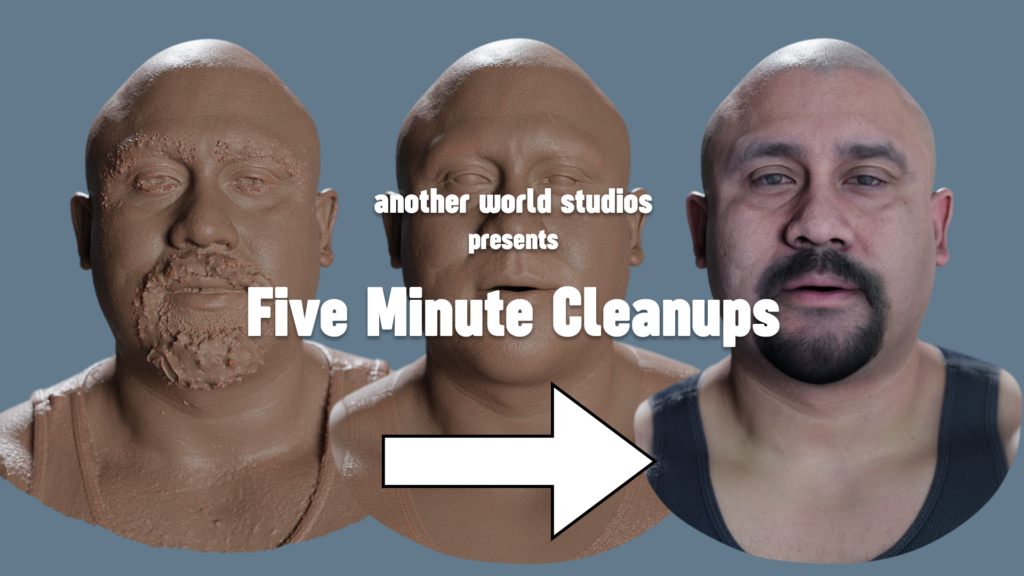
Not everyone is aware of how much work goes into creating and cleaning up head scans for VFX, VR or games. With photogrammetry being so readily available and the reconstruction happening nearly in real-time these days, it’s important to know that there is still much work to be done before an asset can be used in any type of project.
I recently recorded my workflow while working on several head scans I had laying around. I thought it’d be fun to cram the 8 hours of work into a 5 minute time lapse to give you some idea of what my typical work entails.
Here is a quick overview of some of the steps, followed by the video at the end.
Reconstruction
Import color corrected images into Reality Capture and reconstruct high resolution mesh

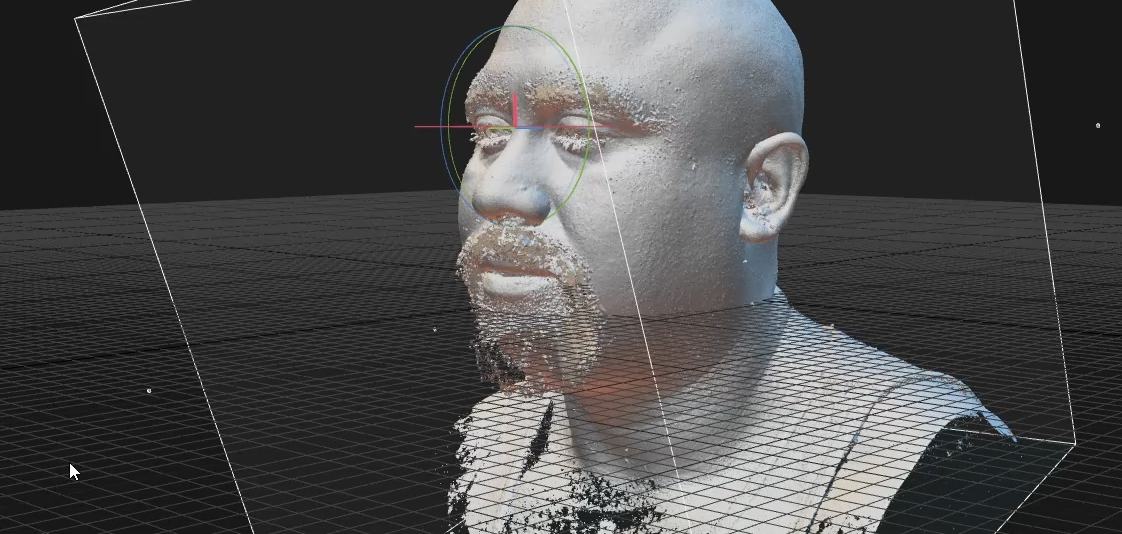
Scan Cleanup / Sculpting
- Open the 3d scan in Blender, sculpt in any details that may have been lost and remove excess noise
- Carve away facial hair and reshape upper lip and chin area
- Use spheres or similar geometry to recreate the proper (or at least better) eye shape using the project brush in Zbrush (you can do it using Shrinkwrap in Blender as well)
- Carve away tank-top

Retopology / Shrinkwrap
- Wrap basemesh onto the cleaned up scan using Wrap
- Export wrapped basemesh in Blender and fix some edge loop positions if necessary
- Periodically check if point order is still correct
- Subdivide basemesh twice and wrap to scan again
- Import into Blender and fix subdivided basemesh, especially the inner corners of the mouth / lips
- In Blender, shrinkwrap most of the basemesh to the scan but shrinkwrap the mouthbag to the subdivided and Wrapped basemesh
- Alter edge loops / edge flow to match facial features
- Keep subdividing basemesh until desired poly-count reached

Texturing / Projecting
- Import into RealityCapture and create a texture map
- Project individual photos of several angles of eyes, eyebrows and facial hair
- In Photoshop, overlay images and mask only the parts you want to keep from each one
- Match contrast, levels and color
- Fix final flaws in Photoshop
- Fix any issues using Blender’s Texture Paint such as seams
- Fill in the lips and mouth bag

Detailing / High-Pass
- Create high pass / detail maps for skin and hair
- In Zbrush, apply high pass / detail maps as separate layers
